Got all strata's sewn and sub cut!

I Put them in 4's then put them in piles of 5's so that I could keep count! (Let me jump ahead of the story for a minute.... All that prep and I still had too many blocks).
I'm using one jelly roll and gray yardage with 8 strips of printed fabric that blends with the jelly roll. This quilt has very little waste!! Bonus!

Ok back to the project....
I took each 4's and layed them out with seams opposing.... First one up, second one down, third one up, fourth one down. That way they will be easy to sew with the seems nesting.

Once I sewed the first to the second, and the third to the fourth.... I sewed those together and.... Ta Da.... A 16 patch.
(Note the sad looking plant in the background.... It's not an easy life for a plant in my house.... Green is my favorite color..but no green on my thumb...)
I should interject here that I just let the colors fall where the may. The only time I changed out a strip was if my printed fabric showed up twice in a block.

I really got into a good rythmn with chain sewing! It went pretty quick!
Next thing ya know all blocks were done and ironed!!
So now the decision turned to the solid block between..... Do I go light..... Or dark... Hhhhmmmm


Got the hubby to weigh in on his opinion.......
And the winner is......

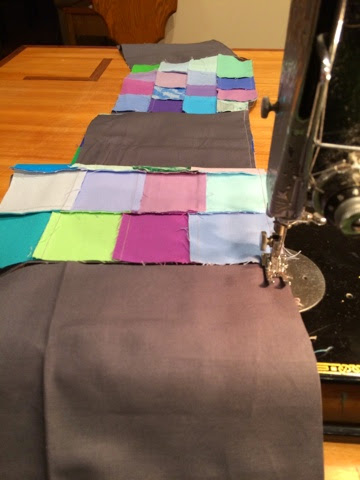
I cut my squares and set the stack of pieced blocks next to the solid blocks and I'm ready to assemble the top.
No laying it all out, moving blocks, second guessing layout..... Nope none of that..... Just let the chips (or blocks) fall where they may!
I took one of each blocks and with right sides together, I sewed together. Without cutting threads I picked up two more blocks. First pair I had the pieced block on bottom, next pair I had gray block on bottom. That way, the top will end up with alternating blocks. This quilt is going to be 9 across and 11 down. So I continued chain piecing pairs til I had 11 sewn.
Basically I now have row 1 and two sewn.

Here's a picture after I sewed all 11 pairs. Pairs are held together by the threads between each pair.
So back to the top to add the alternating 3rd block to each row....

And in no time......


Ta Da.......

I enjoy this method.... It's quick and easy but stunning results!!
Ok.... Part 3.... The quilting will be in a few days.
For New Years Eve day/evening. My bestie and I will be doing our traditional sewing the current Bonnie a Hunter Mystery quilt!! I haven't started mine yet so I'm hoping to get a fair amount done!!
New Year's Day, I will be quilting a special project.... Can't give ya more than that right now.
Then back to the studio on Friday !!
Happy Sewing!!
Jill
Looks great
ReplyDelete